I've been married for almost 12 years. I have spent most of those 12 years trying to perfect chicken breasts. Chicken seems to be an integral part of almost every recipe, and if it's done wrong, it's just not good. Overcooked--chewy, stringy, dry. Undercooked--food poisoning. Always erring on the side of not making anyone sick, my chicken used to invariably end up overcooked.
The litmus test to the success of my chicken is Ken's reaction. Early in our marriage, he used to wait until halfway through the meal to get up from the table and get the barbeque sauce that he uses to moisten my chicken. Then he started to put it on the table before we even sat down. He thinks I don't notice. But I do. It's the highest form of insult!
Then I figured it out! And the result is the most succulent, flavorful chicken with crispy skin, that is perfect every single time. I made it last night. I'm happy to report that the barbeque sauce sat on the table...untouched. Hooray for me!
The kids like it, especially the crispy skin. Elizabeth asked for more skin about three times. Finally, I said, "You can't eat so much skin, E!" She said, "Why not? It's delicious!" Why not, indeed!
Perfect Roast Chicken Breasts
4 split chicken breasts, bone-in, skin on
2 cups dry white wine
salt, pepper, herbs de provence
olive oil
Arrange chicken breasts skin side up in a 9 X 13 baking dish. Pour wine in the bottom of the dish. If you don't want to use wine, use chicken broth. Or a combo of the two!
Drizzle with olive oil. Season generously with salt, pepper, and herbs de provence.
If you are feeling crazy, use a bigger dish and add baby carrots, quartered onions, and baby potatoes!
Bake at 425 degrees for 45-60 minutes, until a thermometer registers 165 degrees.
Wednesday, May 29, 2013
Monday, February 25, 2013
Quick Quesadillas and Fresh Salsa
This time of year I really miss tomatoes from my garden. All juicy and bright red, bursting with flavor. One cannot replicate the taste of a garden tomato. Especially at the end of February in Chicago.
The choices at the store range from hard and light pink, to somewhat red and mealy. And then there are the perfectly red ones with the vine still attached, standing out like an amazing beautiful tomato oasis against all the poor comparisons. They look pretty darn good and tasty, and are whispering to me, "Buy me! Buy me!" Then I look at the price and my dreams are shattered. I usually sigh and walk away. Disgruntled. Elizabeth asks, "Mama, why are you mad at the tomatoes?"
This past week at my favorite market, it seemed like they had an abundance of these sinful red tomatoes on the vine, which I was sure were there just to taunt me. I almost walked past them, but I stopped to check the price. Expensive? Not nearly as much as usual. Hmmm. I felt like someone had mismarked them. So I did what any normal person would do. I grabbed a plastic bag and filled it to the brim with luscious tomatoes.
Once I made it through the checkout line and it was confirmed that yes, that was the price, I allowed myself to think of all the wonderful possibilities. Caprese salad? Definitely. BLT? Uh, yes please. But it was the homemade salsa I envisioned that really made my mouth water. Everything about it says summer, and fresh, and well, deliciousness.
I needed something to go with my salsa. In the spirit of not stuffing my face with junk, I wanted to steer clear of eating the entire bag of Tostitos with my healthy salsa. I kept coming back to simple quesadillas, with just enough cheesy goodness to satisfy my junk craving, but packed with veggies and chicken as well. My lunch was decided, and it was pretty darn good. It will be warmer soon, right?!?
Quick Quesadillas
1 tablespoon olive oil
1/2 onion, chopped
1 bell pepper (use whichever color you prefer), chopped
1 cooked chicken breast, cubed
Shredded monteray jack cheese
2 flour tortillas
1 pat of butter
In a saute pan over medium heat, saute onions in olive oil until golden, about 5 minutes, then add pepper and continue sauteing until peppers are just tender, about 3 minutes more. Add cooked chicken cubes and heat through. Pour contents of pan into bowl and wipe pan clean with a paper towel. Melt pat of butter in pan, place one tortilla in the pan, top with pepper, onion and chicken mixture. I add just enough shredded cheese to keep the quesadilla together when it melts. (I could easily add the entire bag of shredded cheese, but honestly, the veggies really shine when not drowning in cheese! I promise....). Slap another tortilla on top and let the bottom brown, about 3 minutes, then flip over to the other side and let brown, about 2 minutes more. Serve with homemade salsa.
Fresh Salsa
One bunch of cilantro
Juice of 2 limes
1/2 onion
1 jalapeno pepper, seeded and membrane removed
1 teaspoon salt
6 large red tomatoes
In food processor, combine onion, pepper, cilantro, lime juice, salt. Process until chunky. Then add three of the tomatoes. Pulse until just combined and the tomatoes have broken down. Do not over process. Cut the remaining tomatoes in a small dice and fold into your mixture. Adjust seasonings if necessary.
Note: One jalapeno, seeded and with the membrane removed, make a pretty mild salsa. Leave in the seeds and membrane if you want more heat.
The choices at the store range from hard and light pink, to somewhat red and mealy. And then there are the perfectly red ones with the vine still attached, standing out like an amazing beautiful tomato oasis against all the poor comparisons. They look pretty darn good and tasty, and are whispering to me, "Buy me! Buy me!" Then I look at the price and my dreams are shattered. I usually sigh and walk away. Disgruntled. Elizabeth asks, "Mama, why are you mad at the tomatoes?"
This past week at my favorite market, it seemed like they had an abundance of these sinful red tomatoes on the vine, which I was sure were there just to taunt me. I almost walked past them, but I stopped to check the price. Expensive? Not nearly as much as usual. Hmmm. I felt like someone had mismarked them. So I did what any normal person would do. I grabbed a plastic bag and filled it to the brim with luscious tomatoes.
Once I made it through the checkout line and it was confirmed that yes, that was the price, I allowed myself to think of all the wonderful possibilities. Caprese salad? Definitely. BLT? Uh, yes please. But it was the homemade salsa I envisioned that really made my mouth water. Everything about it says summer, and fresh, and well, deliciousness.
I needed something to go with my salsa. In the spirit of not stuffing my face with junk, I wanted to steer clear of eating the entire bag of Tostitos with my healthy salsa. I kept coming back to simple quesadillas, with just enough cheesy goodness to satisfy my junk craving, but packed with veggies and chicken as well. My lunch was decided, and it was pretty darn good. It will be warmer soon, right?!?
Quick Quesadillas
1 tablespoon olive oil
1/2 onion, chopped
1 bell pepper (use whichever color you prefer), chopped
1 cooked chicken breast, cubed
Shredded monteray jack cheese
2 flour tortillas
1 pat of butter
In a saute pan over medium heat, saute onions in olive oil until golden, about 5 minutes, then add pepper and continue sauteing until peppers are just tender, about 3 minutes more. Add cooked chicken cubes and heat through. Pour contents of pan into bowl and wipe pan clean with a paper towel. Melt pat of butter in pan, place one tortilla in the pan, top with pepper, onion and chicken mixture. I add just enough shredded cheese to keep the quesadilla together when it melts. (I could easily add the entire bag of shredded cheese, but honestly, the veggies really shine when not drowning in cheese! I promise....). Slap another tortilla on top and let the bottom brown, about 3 minutes, then flip over to the other side and let brown, about 2 minutes more. Serve with homemade salsa.
Fresh Salsa
One bunch of cilantro
Juice of 2 limes
1/2 onion
1 jalapeno pepper, seeded and membrane removed
1 teaspoon salt
6 large red tomatoes
In food processor, combine onion, pepper, cilantro, lime juice, salt. Process until chunky. Then add three of the tomatoes. Pulse until just combined and the tomatoes have broken down. Do not over process. Cut the remaining tomatoes in a small dice and fold into your mixture. Adjust seasonings if necessary.
Note: One jalapeno, seeded and with the membrane removed, make a pretty mild salsa. Leave in the seeds and membrane if you want more heat.
Saturday, February 2, 2013
Icy Bellinis
We all knew it was just a matter of time until I turned my Vitamix to the dark side. And nothing says Saturday like killing a bottle of champagne before noon. Harry's Bar, you ain't got nothin' on me!
Icy Bellinis
16 oz package of frozen peaches
1/3 cup sugar
Champagne
Using tamper, blend frozen peaches and sugar until all mixed. Fill glasses half full with your peach sorbet. Top with champagne and stir a bit until mixed. YUM.
Icy Bellinis
16 oz package of frozen peaches
1/3 cup sugar
Champagne
Using tamper, blend frozen peaches and sugar until all mixed. Fill glasses half full with your peach sorbet. Top with champagne and stir a bit until mixed. YUM.
Tuesday, January 29, 2013
Vitamix Banana Cream Pie Ice Cream
Ok, seriously. I have problems. I am completely obsessed with my Vitamix. Here's another creamy, delicious soft serve ice cream for your enjoyment.
Banana Cream Pie Ice Cream
3 ripe bananas
1 14oz can sweetened condensed milk
1 cup cream
1/2 cup milk
2 teaspoons vanilla
whipped cream
Blend 2 of the bananas, condensed milk, cream, milk, and vanilla together in your Vitamix until well blended. Pour into ice cube trays and freeze for at least 4 hours.
When ready to serve, take one tray of cubes and blend in the Vitamix, using the tamper as needed. Add the other tray of cubes and continue to tamper down until the mix is smooth and creamy, much like soft serve ice cream. Slice the last banana over the top and add some whipped cream. YUM.
Hey, did you know that you can also make whipped cream in your Vitamix? (The thing is seriously amahzing.) Take 2 cups of cream, 1 tablespoon of sugar, and blend on high for maybe 2 seconds. Hooray!
If you don't have a Vitamix, just use a regular blender to blend it all together. Put in a container and freeze for at least 4 hours. Let the container sit on the counter for a bit to thaw out some before serving. Or, throw in the microwave for a few so it will be easier to spoon!
If you like this, also try my Vitamix New York Cheesecake Ice Cream. You'll love it!
Banana Cream Pie Ice Cream
3 ripe bananas
1 14oz can sweetened condensed milk
1 cup cream
1/2 cup milk
2 teaspoons vanilla
whipped cream
Blend 2 of the bananas, condensed milk, cream, milk, and vanilla together in your Vitamix until well blended. Pour into ice cube trays and freeze for at least 4 hours.
When ready to serve, take one tray of cubes and blend in the Vitamix, using the tamper as needed. Add the other tray of cubes and continue to tamper down until the mix is smooth and creamy, much like soft serve ice cream. Slice the last banana over the top and add some whipped cream. YUM.
Hey, did you know that you can also make whipped cream in your Vitamix? (The thing is seriously amahzing.) Take 2 cups of cream, 1 tablespoon of sugar, and blend on high for maybe 2 seconds. Hooray!
If you don't have a Vitamix, just use a regular blender to blend it all together. Put in a container and freeze for at least 4 hours. Let the container sit on the counter for a bit to thaw out some before serving. Or, throw in the microwave for a few so it will be easier to spoon!
If you like this, also try my Vitamix New York Cheesecake Ice Cream. You'll love it!
Tuesday, January 22, 2013
Vitamix New York Cheesecake Ice Cream
I finally got my long awaited Vitamix for Christmas. I have been drooling over it forever. But they are pretty expensive, and I could never justify it. And this is coming from someone who seriously has every single small appliance known to man (beef jerky from my dehydrator, anyone? no? how about a quesadilla from my quesadilla maker? mini pies? panini? how about some homemade pasta?). I guess Ken knew that I would never buy it for myself, so he got it for me, along with XBOX 360 Kinect Nike Fitness (what are you trying to tell me, Ken?!?).
I sat in awe as I watched Michael Symon run through the paces of the wonder that is Vitamix. But my jaw hit the floor when we were in the frozen dessert segment. You mean I could make delicious frozen treats in minutes?!?! I looked around at my family, who was also watching the video. They sat with their mouths open, eyes darting back and forth from Michael Symon to me, wondering why on Earth I was still sitting there. Finally, Caroline spoke up, "Mom! You gotta make that! Like now! Please!" Minutes later we were enjoying delicious orange sorbet as we watched Michael make some salsa.
And so my love affair began. Every morning I make the girls and I a wholesome smoothie. They contain spinach and wheat germ, fruit, greek yogurt, and a touch of honey. The girls love them and they are a great way to start the day. The smoothie plus a homemade granola bar, and we have officially abandoned frozen waffles and sugary cereals.
But it's the desserts that have won my heart. Every night the girls gobble up their dinners and ask, "What concoction are you making tonight, Mama?" Meyer lemon-honey sorbet! Mango sherbert! Black cherry sherbert! Grapefruit sorbet! Every night, I am literally licking the blender clean. It's the way that the Vitamix blends everything to a lovely, smooth, frosty consistency.
Enter New York Cheesecake Ice Cream. So. Very. Delicious. It's a little more time consuming, as I make the mixture first, then freeze it in ice cube trays. Then I take the frozen cubes and blend them. But overall, you still have about five minutes of actual effort. It provides the perfect ice creamy goodness that I literally dream about all day as I am eating kale and quinuoa and doing burpees and mountain climbers.
Vitamix New York Cheesecake Ice Cream
16 ounces fresh strawberries, washed and trimmed
1 tablespoon sugar
2 packages (8 ounces each) cream cheese
1 cup heavy whipping cream
1 cup milk
1 teaspoon vanilla
1/3 cup sugar
Blend the strawberries and the tablespoon of sugar together in the Vitamix until pureed. You may strain the liquid if you like. Pour into a small container and refrigerate.
After cleaning the blender, blend together the cream cheese, cream, milk, vanilla, and sugar until smooth. Poor into two ice cube trays and freeze for at least 4 hours.
When ready to serve, take one of the trays of the mixture and put it into the blender. On high speed, and using the tamper, blend the cubes until creamy. Add the other tray and continue to blend and tamp down, until you have a smooth, creamy consistency, much like soft serve. Serve with several tablespoons of the strawberry puree drizzled over the top. Serves 6.
Don't have a Vitamix? No worries, just use a regular blender and pour the mixture into your ice cream maker. Or make popsicles, marbling together the cream cheese mixture and the strawberry puree. Or just pour it into a container and freeze as is. Let it thaw on the container a bit as you eat dinner, or even throw it in the microwave for a bit to make it easier to spoon. You won't have the same divine texture as the Vitamix provides, but it will still be delicious!
I sat in awe as I watched Michael Symon run through the paces of the wonder that is Vitamix. But my jaw hit the floor when we were in the frozen dessert segment. You mean I could make delicious frozen treats in minutes?!?! I looked around at my family, who was also watching the video. They sat with their mouths open, eyes darting back and forth from Michael Symon to me, wondering why on Earth I was still sitting there. Finally, Caroline spoke up, "Mom! You gotta make that! Like now! Please!" Minutes later we were enjoying delicious orange sorbet as we watched Michael make some salsa.
And so my love affair began. Every morning I make the girls and I a wholesome smoothie. They contain spinach and wheat germ, fruit, greek yogurt, and a touch of honey. The girls love them and they are a great way to start the day. The smoothie plus a homemade granola bar, and we have officially abandoned frozen waffles and sugary cereals.
But it's the desserts that have won my heart. Every night the girls gobble up their dinners and ask, "What concoction are you making tonight, Mama?" Meyer lemon-honey sorbet! Mango sherbert! Black cherry sherbert! Grapefruit sorbet! Every night, I am literally licking the blender clean. It's the way that the Vitamix blends everything to a lovely, smooth, frosty consistency.
Enter New York Cheesecake Ice Cream. So. Very. Delicious. It's a little more time consuming, as I make the mixture first, then freeze it in ice cube trays. Then I take the frozen cubes and blend them. But overall, you still have about five minutes of actual effort. It provides the perfect ice creamy goodness that I literally dream about all day as I am eating kale and quinuoa and doing burpees and mountain climbers.
Vitamix New York Cheesecake Ice Cream
16 ounces fresh strawberries, washed and trimmed
1 tablespoon sugar
2 packages (8 ounces each) cream cheese
1 cup heavy whipping cream
1 cup milk
1 teaspoon vanilla
1/3 cup sugar
After cleaning the blender, blend together the cream cheese, cream, milk, vanilla, and sugar until smooth. Poor into two ice cube trays and freeze for at least 4 hours.
When ready to serve, take one of the trays of the mixture and put it into the blender. On high speed, and using the tamper, blend the cubes until creamy. Add the other tray and continue to blend and tamp down, until you have a smooth, creamy consistency, much like soft serve. Serve with several tablespoons of the strawberry puree drizzled over the top. Serves 6.
Don't have a Vitamix? No worries, just use a regular blender and pour the mixture into your ice cream maker. Or make popsicles, marbling together the cream cheese mixture and the strawberry puree. Or just pour it into a container and freeze as is. Let it thaw on the container a bit as you eat dinner, or even throw it in the microwave for a bit to make it easier to spoon. You won't have the same divine texture as the Vitamix provides, but it will still be delicious!
Tuesday, January 15, 2013
Homemade Egg Drop Soup
There's nothing like homemade chicken stock. It conjours up images of my grandmother's kitchen, where nothing was ever from a box and the bacon grease jar under the kitchen sink was used daily. One of my fondest memories is the soup my grandma made me one day after school. Homemade broth with acini de pepe pasta and some bibb lettuce floating on top. I was blown away by it's simplicity and deliciousness. I've made it plenty of times, but it's just not the same as that day, sitting in her simple kitchen, sun streaming through the window, completely satisfied with life.
These days I opt for boxed stock, mostly because there's never enough room in my freezer for making my own. In an attempt to reduce sodium and processed foods in my life, I thought stock was a good place to start. I use it frequently, and you never really know what you're getting with the boxed stuff. Also, I needed to clean out my freezer!
I usually use Barefoot Contessa's Chicken Stock recipe, with a few alterations. I use whatever herbs I have on hand, and I usually use whatever chicken pieces I have in the freezer that I want to use up. But this is a great place to start if you've never made stock before.
Armed with my quart containers full of beautiful stock, the first thing needed is a simple soup echoing the simplicity of my grandma. Something where the true homemade goodness shines through. That's where this egg drop soup comes in!
Egg Drop Soup
4 cups chicken stock (preferably homemade, but your favorite store brand will also work)
4 egg whites, whisked with a fork
4 scallions, chopped, white and light green parts only
salt and white pepper to taste
Bring the stock to a gentle boil in a sauce pan over medium heat. As you slowly stir the broth, add the egg whites slowly. The egg will cook, forming ribbons. Add chopped scallions, season to your taste with salt and white pepper. Enjoy!
Monday, January 14, 2013
Sausage, Peppers, and Pasta
This is one of my frequent go-to meals for the family when we time is short but I still want the satisfaction of a hearty meal. My daughter Grace begs for this meal weekly, and there is truly nothing better than seeing her eyes light up when I answer the daily question of "What's for dinner??" with "Your favorite!"
I've made this recipe a little healthier lately by using whole wheat pasta and turkey sausage. It's still delicious, and I find that all the flavors mask the taste of the whole wheat pasta. (I appreciate it's better for you, but in my mind, it will never compare to "real" pasta). Grace said, "I don't know what you did to this, but it's better than usual!" I'll take it!
Sausage, Peppers, and Pasta
I've made this recipe a little healthier lately by using whole wheat pasta and turkey sausage. It's still delicious, and I find that all the flavors mask the taste of the whole wheat pasta. (I appreciate it's better for you, but in my mind, it will never compare to "real" pasta). Grace said, "I don't know what you did to this, but it's better than usual!" I'll take it!
Sausage, Peppers, and Pasta
- 1 tablespoon olive oil
- 1.25 pounds of Italian sausage, casings removed, broken into chunks (use whatever sausage you like--hot, mild, sweet, turkey, pork, or any combination thereof!)
- 1 each red, yellow, and orange bell peppers, sliced
- 1 medium onion, sliced
- 2 cloves garlic, minced
- 1/2 cup dry white wine (I enjoy a Pinot Grigio)
- 1 cup chicken broth
- 1/2 cup grated parmesan
- 1/4 cup parsley, chopped
- 1/4 cup basil, chopped
- 1 teaspoon salt
- 1/2 teaspoon pepper
- 1 lb short pasta such as rigatoni, bow tie, penne
Thursday, January 10, 2013
A Resolve to be Resolute
I'm refusing to make a New Year's Resolution this year. Flat out refusing. Oh sure, I'm on the bandwagon that everyone is on after the holidays...let's organize! let's exercise! let's eat healthy! There's just something about this time of year where hope springs eternal, everything is a new beginning, and the possibilities for success are limitness. And then I eat a brownie. And it all goes to hell in a handbasket.
This year I am not putting myself through that. I'm instead making some real, honest-to-goodness goals that are actually possible to acheive. And they all have an overarching theme. Be better to myself. That's it. Not be pefect, not be a size 0, not only eat pine nuts and tofu. Just be better in the things I do for myself and my family. Here's a breakdown of my goals for 2013.
1. Get my nutrition in order. Yes, I need to lose 10 pounds (and then 10 more). I don't eat anything all day, and then I eat a ton for dinner, and half a bag of doritos at 11 pm. And then I just feel like crap. It's gotta stop. I'm a great cook, I make awesome things. I just need to put a little more effort in the things I put in my body, and the way that I do it.
2. Get moving. I need to exercise more. But instead of making some insane workout plan that is impossible to stick to, my only requirement is that I do SOME movement a few times a week.
3. Get my life in order. There's paperwork everywhere. There's recipes everywhere. There's cookbooks everywhere. There's craft stuff everywhere. There's every piece of paper that ever came home from school everywhere. I need to declutter and get it together. There's this closet....Ken says it looks like an episode of Hoarders. It does. But I don't need to organize my life all at once or not at all. So I'm devising a plan to tackle it a little at a time. No pressure.
4. Make more time for myself. This little blog has been fun for the past several weeks. I find myself forcing time to make crafts or write down that recipe that I've always made, just for the benefit of all three of you who read this. I think this is a good thing. I feel more creative, more energized, more inspired. The best part is, when I'm being creative and enjoying myself, my kids and husband are too. Imagine that!
Most of all, I need to cut myself a break! Instead of throwing it all away once I make a mistake, I will brush myself off and just move forward. I will be resolute in just trying to be better. After all, I will clean out the hoarders closet and then two weeks later shove a whole bunch of stuff back in it before someone comes over. (It's true.) And I will most definitely eat a brownie.
This year I am not putting myself through that. I'm instead making some real, honest-to-goodness goals that are actually possible to acheive. And they all have an overarching theme. Be better to myself. That's it. Not be pefect, not be a size 0, not only eat pine nuts and tofu. Just be better in the things I do for myself and my family. Here's a breakdown of my goals for 2013.
1. Get my nutrition in order. Yes, I need to lose 10 pounds (and then 10 more). I don't eat anything all day, and then I eat a ton for dinner, and half a bag of doritos at 11 pm. And then I just feel like crap. It's gotta stop. I'm a great cook, I make awesome things. I just need to put a little more effort in the things I put in my body, and the way that I do it.
2. Get moving. I need to exercise more. But instead of making some insane workout plan that is impossible to stick to, my only requirement is that I do SOME movement a few times a week.
3. Get my life in order. There's paperwork everywhere. There's recipes everywhere. There's cookbooks everywhere. There's craft stuff everywhere. There's every piece of paper that ever came home from school everywhere. I need to declutter and get it together. There's this closet....Ken says it looks like an episode of Hoarders. It does. But I don't need to organize my life all at once or not at all. So I'm devising a plan to tackle it a little at a time. No pressure.
4. Make more time for myself. This little blog has been fun for the past several weeks. I find myself forcing time to make crafts or write down that recipe that I've always made, just for the benefit of all three of you who read this. I think this is a good thing. I feel more creative, more energized, more inspired. The best part is, when I'm being creative and enjoying myself, my kids and husband are too. Imagine that!
Most of all, I need to cut myself a break! Instead of throwing it all away once I make a mistake, I will brush myself off and just move forward. I will be resolute in just trying to be better. After all, I will clean out the hoarders closet and then two weeks later shove a whole bunch of stuff back in it before someone comes over. (It's true.) And I will most definitely eat a brownie.
Friday, December 28, 2012
Peasant's Pasta
About 15 years ago, when my husband and I first started dating, we used to frequent this lovely little Italian restaurant in Lincoln Park. We were there at least three times a week. And every single time we went, without fail, my husband ordered his favorite dish, peasant's pasta. And every time, he would exclaim, "This is the best pasta I've ever eaten!"
Eventually, we became suburbanites, and our little place closed down. But luckily, I have been able to recreate, with some success, his favorite recipe (which is also now my oldest daughter's favorite!)
We had a lot of leftover ham after our Christmas feast, and this recipe is quick and simple for using up those leftovers!
Peasant's Pasta
adapted from Cucina Bella
3 cups chopped cooked ham
2 cups each frozen corn and frozen peas
2 cloves garlic, minced
1/2 cup basil, minced
1/2 cup parsley, minced
1 T olive oil
1 pint heavy whipping cream
1/2 cup grated parmesan cheese
1 lb pasta (I like rigatoni or bowtie)
salt and pepper
Cook pasta according to package directions.
Meanwhile, in a large pot, saute garlic in olive oil for 1 minute over medium high heat. Add ham and warm through. When some of the pieces begin to brown, add your frozen corn and peas, and stir to warm through. Add the cream and cheese, stirring frequently. When the mixture begins to bubble, add the cooked pasta. Stir until some of the cream is absorbed, and your pasta has a nice, creamy consistency. Add the basil and parsley. Sprinkle each serving with more parmesan cheese.
Eventually, we became suburbanites, and our little place closed down. But luckily, I have been able to recreate, with some success, his favorite recipe (which is also now my oldest daughter's favorite!)
We had a lot of leftover ham after our Christmas feast, and this recipe is quick and simple for using up those leftovers!
Peasant's Pasta
adapted from Cucina Bella
3 cups chopped cooked ham
2 cups each frozen corn and frozen peas
2 cloves garlic, minced
1/2 cup basil, minced
1/2 cup parsley, minced
1 T olive oil
1 pint heavy whipping cream
1/2 cup grated parmesan cheese
1 lb pasta (I like rigatoni or bowtie)
salt and pepper
Cook pasta according to package directions.
Meanwhile, in a large pot, saute garlic in olive oil for 1 minute over medium high heat. Add ham and warm through. When some of the pieces begin to brown, add your frozen corn and peas, and stir to warm through. Add the cream and cheese, stirring frequently. When the mixture begins to bubble, add the cooked pasta. Stir until some of the cream is absorbed, and your pasta has a nice, creamy consistency. Add the basil and parsley. Sprinkle each serving with more parmesan cheese.
The Sweetest Gift
The holidays are a time for being with family and friends. I like to show my appreciation for my favorite people by showering them with homemade treats! I pick a day before the holidays, and spend a day with my girls making our favorite recipes from throughout the year. This year, our theme was homemade versions of our favorite treats--snickers, reese's peanut butter cups, oreos, and oatmeal creme pies. Here are the links to my most favorite recipes!
All of the recipes are wonderful on their own, but together.....it's just really something special to have all that goodness in one box all your own!
And since by now you all know I spend a lot of time at Hobby Lobby, I picked up some very festive treat boxes to pack them. It's all in the presentation!
Delicious gifts for all your loved ones! Enjoy!
All of the recipes are wonderful on their own, but together.....it's just really something special to have all that goodness in one box all your own!
And since by now you all know I spend a lot of time at Hobby Lobby, I picked up some very festive treat boxes to pack them. It's all in the presentation!
Delicious gifts for all your loved ones! Enjoy!
Tuesday, December 18, 2012
Not Your Momma's Brussel Sprouts
I was the exception to the rule when it came to vegetables growing up. I loved them. I ate my green beans, broccoli, and salad without any fuss, and even helped my dad in his vegetable garden. I was known for picking cherry tomatoes right off the vine and popping them in my mouth. But if you put brussel sprouts in front of me, I would not touch them. I don't know if they were frozen or canned, but the way they were prepared just sucked (love you, Mom!). All I saw were dull green, bitter, soggy balls of disgustingness. I made it my life mission to avoid them. Once I finally won at the game of "sit there until they're gone" (I think it was three hours before they caved), I made it my life mission to never eat them again.
Several years after I was married, a chef friend had us over for Christmas. He prepared a beautiful duck with a side of brussel sprouts. Oh, the horror!! I had to eat it, of course. I dreaded putting it in my mouth. But I did....and quite possibly, it was the best thing I ever ate in my life. My eyes were now open to what brussel sprouts could be!
I was determined not to let my children waste 30 years of their lives hating brussel sprouts. Here's my fail proof recipe to make brussel sprouts one of your favorite veggies. All three of my kids gobble them up!
Not Your Momma's Brussel Sprouts
1 lb brussel sprouts, shredded
1 garlic clove, minced
5-6 slices of bacon, chopped
1/3 cup chicken broth
Brown bacon in large skilet until crispy. Add garlic and let cook 1 minute. Add shredded brussel sprouts. Saute over medium heat until some pieces begin to brown, about 5 minutes. Add 1/3 cup chicken broth to deglaze the pan, sturring up all the brown bits on the bottom of the pan. Cover and let simmer of low heat for 5 munutes, or until just tender. Add salt and pepper to taste.
Several years after I was married, a chef friend had us over for Christmas. He prepared a beautiful duck with a side of brussel sprouts. Oh, the horror!! I had to eat it, of course. I dreaded putting it in my mouth. But I did....and quite possibly, it was the best thing I ever ate in my life. My eyes were now open to what brussel sprouts could be!
I was determined not to let my children waste 30 years of their lives hating brussel sprouts. Here's my fail proof recipe to make brussel sprouts one of your favorite veggies. All three of my kids gobble them up!
Not Your Momma's Brussel Sprouts
1 lb brussel sprouts, shredded
1 garlic clove, minced
5-6 slices of bacon, chopped
1/3 cup chicken broth
Brown bacon in large skilet until crispy. Add garlic and let cook 1 minute. Add shredded brussel sprouts. Saute over medium heat until some pieces begin to brown, about 5 minutes. Add 1/3 cup chicken broth to deglaze the pan, sturring up all the brown bits on the bottom of the pan. Cover and let simmer of low heat for 5 munutes, or until just tender. Add salt and pepper to taste.
Sunday, December 16, 2012
Sophisticated Snowflakes
When we bought our house five years ago, I had our Christmas decorations all planned out before the contract was even signed. As I love to decorate and be creative, my plan was pretty extensive. In my mind's eye, upon walking into my house, one would be transported into a Christmas wonderland. I certainly enjoyed the process, and I made most of my choices well. A few years in, however, my overzealousness for decorating has resulted in some logistical nightmares. The tree I insisted on putting in our family room (because the fancy one was in living room) resulted in a month of picking up broken ornaments as the dog's wagging tail hit the branches, and swear words as we all tripped over it while trying to get out the back door. Finally, a few years ago, I moved the family tree in the living room, and the fancy tree in the dining room, pretty much leaving my family room devoid of Christmas cheer. I was more than a little miffed at the situation (issues, I know!), but having already spent a ton on decorations, and running out of room to store them, I wasn't about to go buy more stuff.
My frustration with my decorations was severly hindering my Christmas spirit. And this year, I decided that I was permitted to allow my creative juices to flow.
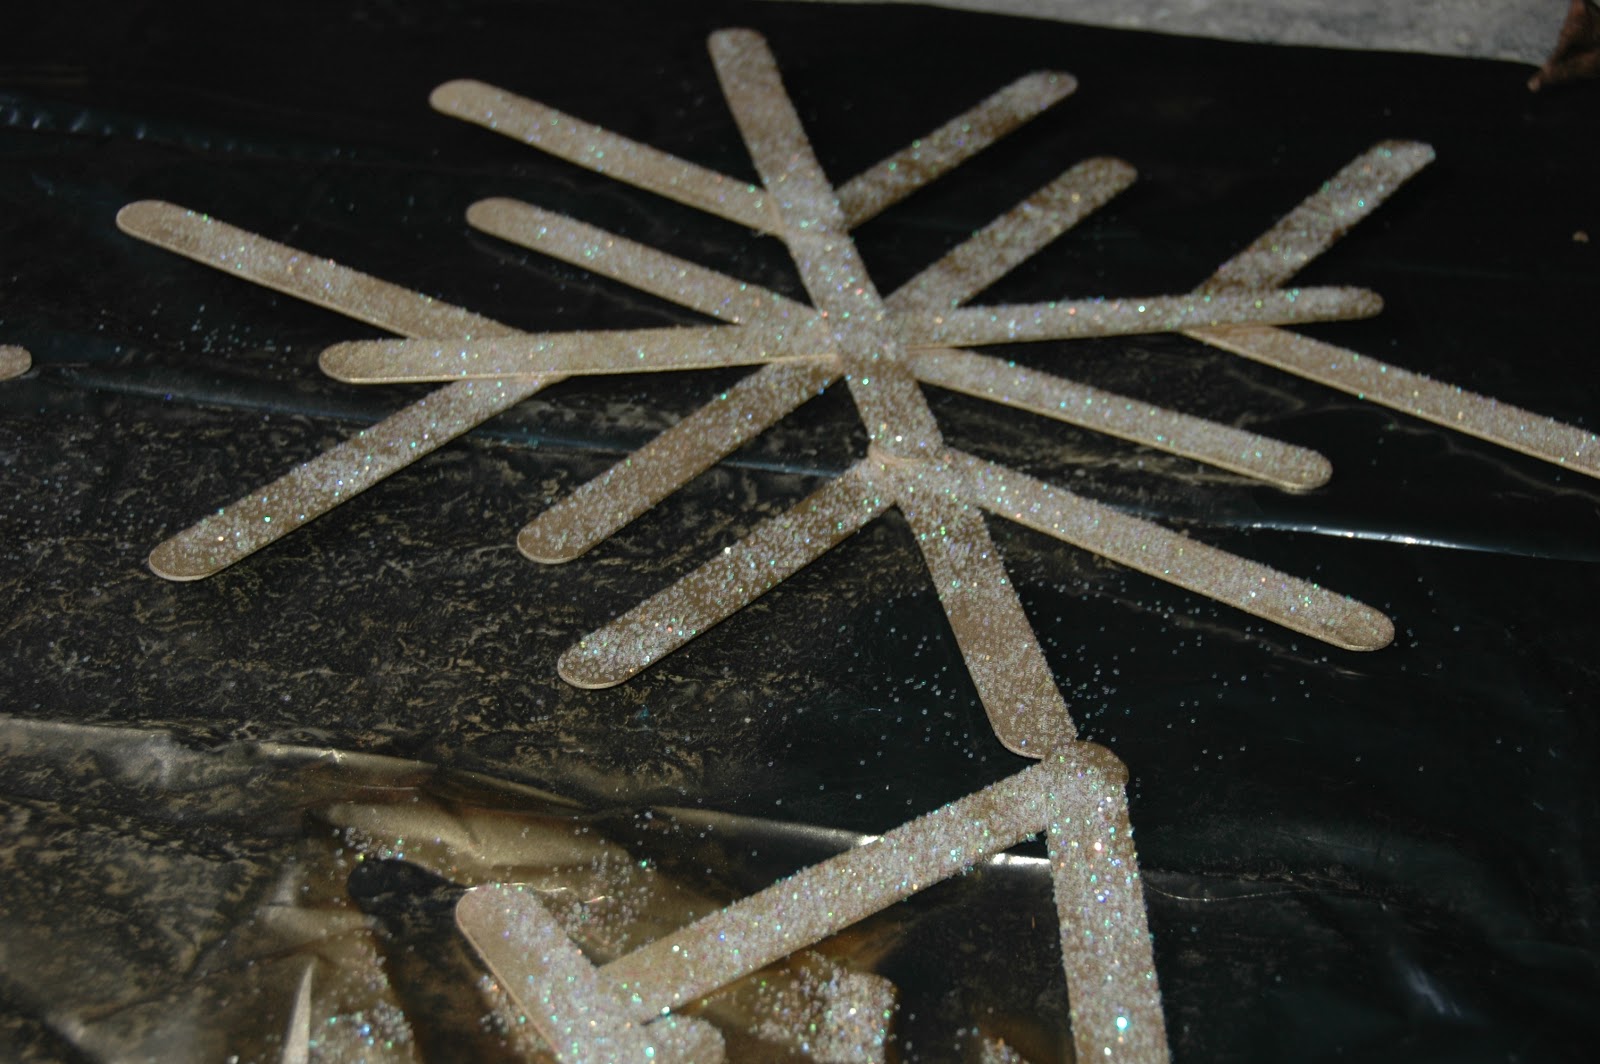
I had seen several snowflakes made out of popsicle sticks on the internet. I thought it was an interesting idea, but they looked like, well, they were made from popsicle sticks. I decided I had to try and make them for my front windows, as none of my trees are visible from the street (irksome). But they needed an air of sophistication to match my fancy dining room tree! Here is what I came up with.
Supplies
popsicle sticks
jumbo popsicle sticks
metallic gold spray paint
adhesive spray
glitter
gems
gold ribbon, two sizes (thin and thick to match the width of the sticks)
clear suction cups (I got both medium and large)
glue gun
I found all of the above at my local Hobby Lobby, with the exception of the spray paint and suction cups, which I got at Home Depot. All I did was heat up the hot glue gun, and made some snowflakes. Not brain surgery. I used regular popsicle sticks for the smaller ones, and the jumbo sticks for the large ones. I felt that this provided the visual variety I was looking for.
After I had made a bunch of snowflakes, I spray painted them on both sides with the gold spray paint. After that dried, I sprayed some adhesive on, and sprinkled them with glitter. I did this on both sides, since I figured the mailman and fedex guy would also enjoy the sparkle from the outside. Once that was dry (the dog only ate one), they came back inside and I used the glue gun to embellish on both sides with some gems. I was sure to glue on a ribbon to hang them. Using the suction cups, I hung them from both my dining room and living room windows. Ta-da! Eat your heart out, UPS man!
Oh, and as a side note, while I was at Hobby Lobby, they were having a 50% off sale, which of course was fate telling me to figure out my family room problem. So, storage be damned, I bought a couple (ok, five) pencil trees and some snow. I decorated them with some red and gold ornaments from our old house that had been in storage (see Ken, we do use it all!). No one is tripping over anything, and our family room isdripping gushing with holiday cheer. Hooray! Christmas is saved!
My frustration with my decorations was severly hindering my Christmas spirit. And this year, I decided that I was permitted to allow my creative juices to flow.
I had seen several snowflakes made out of popsicle sticks on the internet. I thought it was an interesting idea, but they looked like, well, they were made from popsicle sticks. I decided I had to try and make them for my front windows, as none of my trees are visible from the street (irksome). But they needed an air of sophistication to match my fancy dining room tree! Here is what I came up with.
Supplies
popsicle sticks
jumbo popsicle sticks
metallic gold spray paint
adhesive spray
glitter
gems
gold ribbon, two sizes (thin and thick to match the width of the sticks)
clear suction cups (I got both medium and large)
glue gun
I found all of the above at my local Hobby Lobby, with the exception of the spray paint and suction cups, which I got at Home Depot. All I did was heat up the hot glue gun, and made some snowflakes. Not brain surgery. I used regular popsicle sticks for the smaller ones, and the jumbo sticks for the large ones. I felt that this provided the visual variety I was looking for.
After I had made a bunch of snowflakes, I spray painted them on both sides with the gold spray paint. After that dried, I sprayed some adhesive on, and sprinkled them with glitter. I did this on both sides, since I figured the mailman and fedex guy would also enjoy the sparkle from the outside. Once that was dry (the dog only ate one), they came back inside and I used the glue gun to embellish on both sides with some gems. I was sure to glue on a ribbon to hang them. Using the suction cups, I hung them from both my dining room and living room windows. Ta-da! Eat your heart out, UPS man!
Oh, and as a side note, while I was at Hobby Lobby, they were having a 50% off sale, which of course was fate telling me to figure out my family room problem. So, storage be damned, I bought a couple (ok, five) pencil trees and some snow. I decorated them with some red and gold ornaments from our old house that had been in storage (see Ken, we do use it all!). No one is tripping over anything, and our family room is
Monday, December 10, 2012
Infused Vodkas
Vodka is my drink of choice. Mostly, just a vodka tonic. I've always enjoyed flavored vodkas, but I've always found them kinda disappointing in the depth of whatever flavor they were supposed to be. When I saw a post on Pinterest for cranberry-lime infused vodka, I was intrigued. It never even occurred to me that I could make my own! I immediately sent out Ken to buy some vodka. He arrived home with two 1.75 liter bottles. Four days later, one of them was gone. Oops! I guess we enjoyed taste testing all of our creations a little too much. My friend's fortieth birthday was coming up, and as she is a martini lover, I knew that a gift of infused vodkas would be well enjoyed. Here's what I came up with.
Please check out this link for this marvelous cranberry-lime infused vodka. Click here. It's perfection and I wouldn't change a thing! First, I picked up some fancy bottles at Pier 1. Then I poked holes in cranberries with a paring knife. I filled the bottle halfway with cranberries, added a few lime peels, and filled the rest of the bottle up to almost the top with the poked cranberries. I added two tablespoons of sugar, then used a funnel to fill it up with vodka. I let it sit for a day (it was really, really hard to wait!!). Delicious! The recipe I used says it can last up to a month. But trust me, it will be gone before you know it!
Ok, I was hooked!! The next day, I just happened to see in the December 2012 issue of Everyday with Rachael Ray, a recipe for peppermint infused vodka. (It was fate telling me to drink more vodka.) All you need to do is crush up twelve candy canes in a food processer, add it to 750mL of vodka, and let it dissolve. It takes about half an hour. Two ounces of this peppermint vodka with two ounces of Godiva chocolate liqueur in a martini glass drizzled with chocolate syrup??? Heaven, that's what it is.
What else can I do?? I had tons of clementines in the fridge. I washed them, rolled them on the counter a bit to release the juices, cut them in half and filled a carafe. I then filled that with vodka. I let that sit for two days as well, before I strained it and put it in a bottle. Especially tasty with tonic water!
Finally, I decided to try and spruce up my bloody marys. Three tablespoons of black peppercorns added to 750mL of vodka really does the trick. Let it sit until it turns a disgusting brown color (sad, but true) and then strain it. Again, two days for me. Just use it along with your favorite bloody mary mix (We like Zing Zang). Bloody marys will never be the same.
I decided on Peppermint, Cranberry-Lime, and Clementine for my friend's birthday. Here's how it turned out. Put in cute bottles with some Fabulous Felt Ornaments (martini themed, of course!) and you've got a great holiday (or birthday) gift.
I can't wait to try some more! But sadly, my vodka budget is used up for the month. LOL. I'll update you with any new ones I try, and please let me know if you have some ideas, too!
Tuesday, December 4, 2012
Sugar Scrubs
This past weekend was full of holiday cheer! I attended a Martini and Mashed Potato party for the moms in my daughter's second grade class. It was given by two of the loveliest moms I know, and I wanted to bring them something special for organizing such a wonderful event. The party was absolutely amazing! Hopefully they enjoyed some pampering after our night of martinis, in the form of this lovely sugar scrub that I found on Pinterest. Click here.
Basically, here's the low down. One part coconut oil to two parts sugar. Melt your coconut oil in a saucepan over low heat. Remove from heat and add stir in sugar. Then add your essential oils to your liking. I used grapefruit because I love the smell, but I think the peppermint would also work well, epecially for Christmas gifts! I also used just a few drops (like two) of red food coloring. Just enough to give it a gentle pink hue, but not enough to stain anything.
I put the scrub in some cute mason jars, and took it upon myself to jazz it up. Here's the finished product!
Basically, here's the low down. One part coconut oil to two parts sugar. Melt your coconut oil in a saucepan over low heat. Remove from heat and add stir in sugar. Then add your essential oils to your liking. I used grapefruit because I love the smell, but I think the peppermint would also work well, epecially for Christmas gifts! I also used just a few drops (like two) of red food coloring. Just enough to give it a gentle pink hue, but not enough to stain anything.
I put the scrub in some cute mason jars, and took it upon myself to jazz it up. Here's the finished product!
Sunday, November 25, 2012
Creamy Chicken Florentine
Usually, the weekend after Thanksgiving is a blur of me trying to put up all the Christmas decorations. Each of the girls get their own tree, there's one in the dining room, one in the lving room, and even one in the playroom! In past years, I have stressed myself out trying to get everything up and out of the way. I end up in such a hurry that no one else really gets to participate. Feed yourselves, people, I'm busy! The perfectionist in me demands that everything look a certain way, which usually means I am dictating orders to everyone else. After a little self-examination, I decided to slow things down a bit and add back in the fun.
I've never wanted a real tree. It seemed like such a hassle! Sap, needles, it not being a perfect triangle.....(I have issues, I know!). This year, in my quest to bring back the magic to Christmas, I decided to completely change it up. We went to a farm to cut down our own tree! Ken raised his eyebrows at me, thinking I was not going to be able to handle the spontaneity. The day was beautiful, with crisp air and bright sun. It did take a little while to find one that met my qualifications, but I think we did alright! Afterwards, we enjoyed an apple donut and hot apple cider. Oh what fun!! We may have started a new tradition.
Upon arriving home, we were chilled to the bone, and needed something quick, creamy and warm to fill our bellies. After scouring the fridge, here is what I made.
CREAMY CHICKEN FLORENTINE
1 medium onion, diced
2 garlic cloves, minced
5 oz fresh baby spinich
3 cups chicken broth
8 oz cream cheese
4 cups cooked chicken, cubed
1 T cornstarch
1 T olive oil
1 lb bowtie pasta
Parmesan cheese
Cook pasta according to package directions.
Meanwhile, in large saute pan, saute onion in olive oil over medium heat until translucent, 5 to 7 minutes. Add garlic, cook 1 minute more. Add spinach, cook 2-3 minutes until spinach has wilted. Add chicken, and stir to combine. Add chicken broth, heat until just to a boil.
In a small bowl, wisk together cornstarch with a few tablespoons of the hot broth from the pan until their are no lumps. Wisk into the pan, stirring until the broth thickens. Reduce heat to low. Cut cream cheese into chunks and wisk into the pan, until sauce is nice a creamy. Heat through. Add salt and pepper to taste.
When pasta is done, add directly to pan and combine. Top with a sprinkle of parmesan cheese. Serves 6.
I've never wanted a real tree. It seemed like such a hassle! Sap, needles, it not being a perfect triangle.....(I have issues, I know!). This year, in my quest to bring back the magic to Christmas, I decided to completely change it up. We went to a farm to cut down our own tree! Ken raised his eyebrows at me, thinking I was not going to be able to handle the spontaneity. The day was beautiful, with crisp air and bright sun. It did take a little while to find one that met my qualifications, but I think we did alright! Afterwards, we enjoyed an apple donut and hot apple cider. Oh what fun!! We may have started a new tradition.
Upon arriving home, we were chilled to the bone, and needed something quick, creamy and warm to fill our bellies. After scouring the fridge, here is what I made.
CREAMY CHICKEN FLORENTINE
1 medium onion, diced
2 garlic cloves, minced
5 oz fresh baby spinich
3 cups chicken broth
8 oz cream cheese
4 cups cooked chicken, cubed
1 T cornstarch
1 T olive oil
1 lb bowtie pasta
Parmesan cheese
Cook pasta according to package directions.
Meanwhile, in large saute pan, saute onion in olive oil over medium heat until translucent, 5 to 7 minutes. Add garlic, cook 1 minute more. Add spinach, cook 2-3 minutes until spinach has wilted. Add chicken, and stir to combine. Add chicken broth, heat until just to a boil.
In a small bowl, wisk together cornstarch with a few tablespoons of the hot broth from the pan until their are no lumps. Wisk into the pan, stirring until the broth thickens. Reduce heat to low. Cut cream cheese into chunks and wisk into the pan, until sauce is nice a creamy. Heat through. Add salt and pepper to taste.
When pasta is done, add directly to pan and combine. Top with a sprinkle of parmesan cheese. Serves 6.
Friday, November 23, 2012
Fabulous Felt Ornaments
One of the most stressful things about gift giving in the holiday season? Those small gifts we have to give to everyone that is involved in our lives one way or the other...mailperson, teachers, milkman, neighbors, hostess gifts. I always feel like they are so impersonal. Does the mailperson really want a Starbucks gift card....again???
I feel like at the end of the day, I've spent a whole lot of money on these small gifts that no one really wants or remembers. My mission this year is two-fold---spend less money, and be meaningful! Oh wait, I aslo don't want to spend forever on getting this done.
Pinterest is the answer to my prayers. I mean really. My life was meaningless before Pinterest. There are so many ideas for cute, clever, handmade gifts. And ideas for snacks to eat while making said gifts. There are so many that I want to try!
I saw this pin depicting cute Christmas tree ornaments made from felt on Etsy. Click here.
Instantly I remembered some ornaments on my mom’s tree that she had made when I was a baby. I thought to myself, “Self, you can make those!” So, I was off to Hobby Lobby to investigate. I picked up some felt, embroidery floss, thread, and some small buttons. I thought I could use some batting that I already had. When I got home I set about making a template. I just drew out my simple shapes on cardstock and cut them out.
I feel like at the end of the day, I've spent a whole lot of money on these small gifts that no one really wants or remembers. My mission this year is two-fold---spend less money, and be meaningful! Oh wait, I aslo don't want to spend forever on getting this done.
Pinterest is the answer to my prayers. I mean really. My life was meaningless before Pinterest. There are so many ideas for cute, clever, handmade gifts. And ideas for snacks to eat while making said gifts. There are so many that I want to try!
I saw this pin depicting cute Christmas tree ornaments made from felt on Etsy. Click here.
Instantly I remembered some ornaments on my mom’s tree that she had made when I was a baby. I thought to myself, “Self, you can make those!” So, I was off to Hobby Lobby to investigate. I picked up some felt, embroidery floss, thread, and some small buttons. I thought I could use some batting that I already had. When I got home I set about making a template. I just drew out my simple shapes on cardstock and cut them out.
After
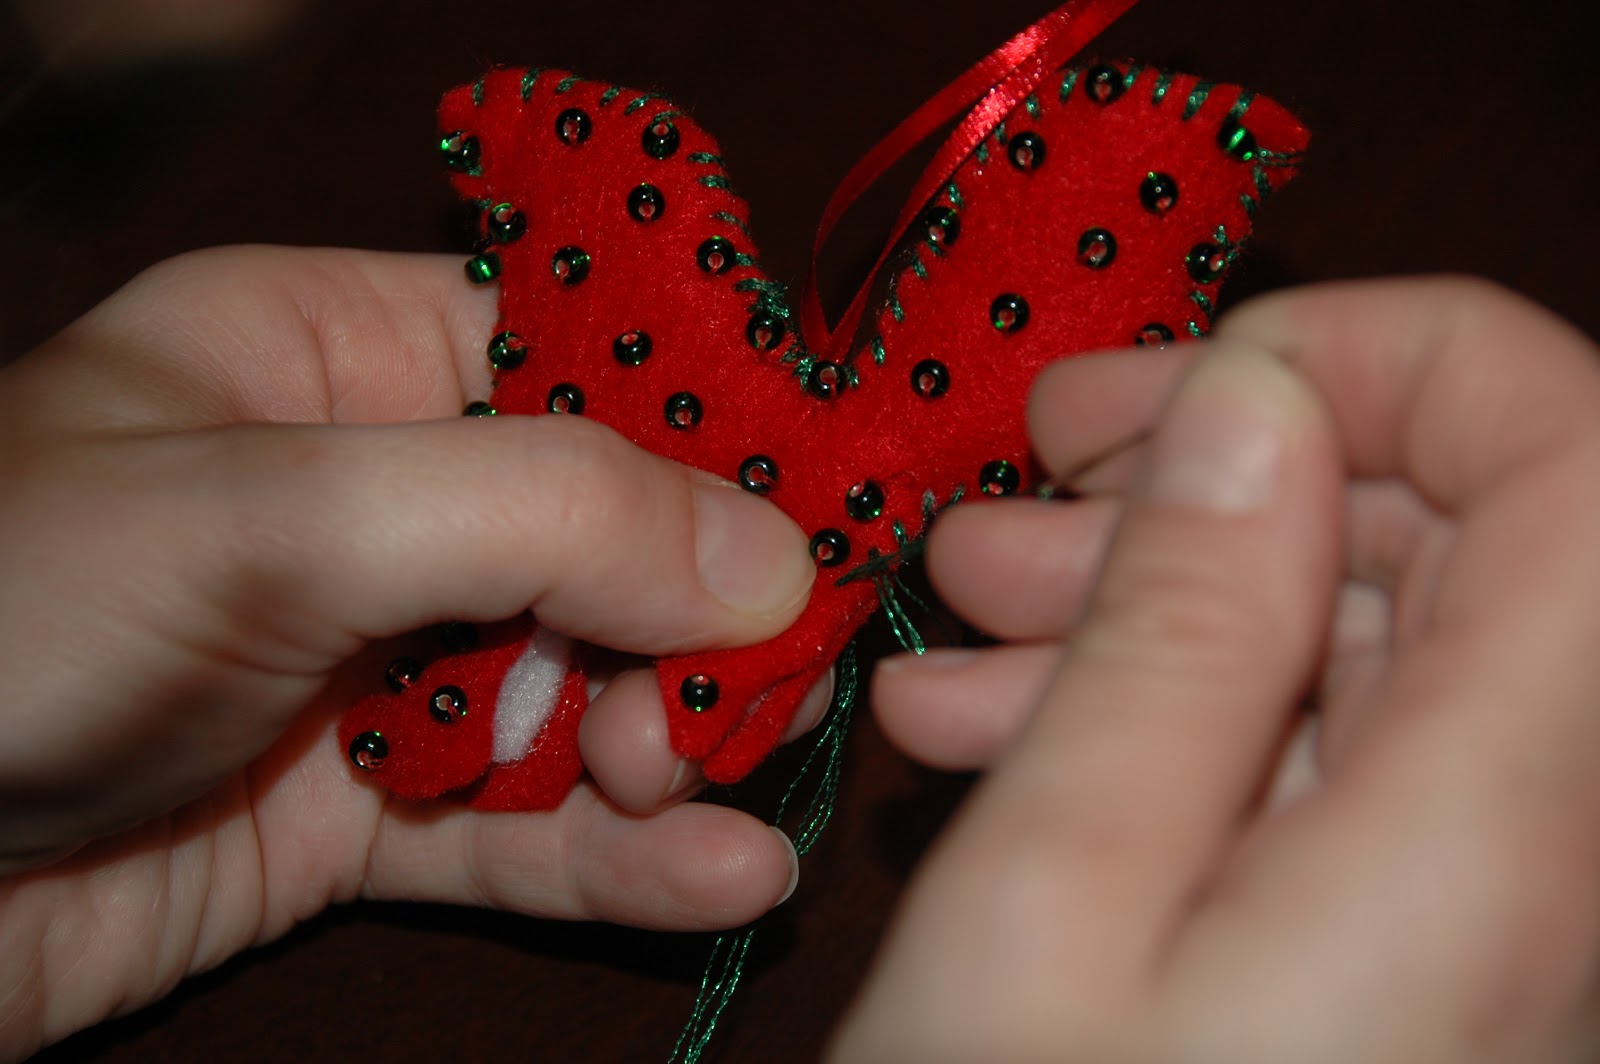
cutting out the template, I cut two of each shape out of my chosen felt. I took one of the Christmas trees and sewed
buttons on them to look like ornaments.
Then I attached the stems to each tree piece, taking care to
make sure that both tree pieces match up.
I cut out some batting to put in between
my two pieces of felt, so the ornament would be more puffy. This step is entirely optional. Making sure the pretty sides were facing out,
I sewed the two trees together. A
straight stitch can be used all the way around.
Or even a blanket stitch.
Then
I thought, why couldn’t I make a monogram oranament?? I opened up a Word document, found a suitable
font (cooper black) and size (375 for mine).
Print and cut.
Here’s a pic of how I sewed the edges together. Make sure to sew in a ribbon at the top to
hang it!
I was pretty satisfied with my efforts! I needed more ideas. Back to Pinterest. I found these cute felt ornaments. Please check out this link! Click here.
I of course had to change it up a bit, so mine look like
this!
Then, just like I always do, I have to take it too far! LOL. I
scoured Pinterest for felt ornament templates and coloring page printables that might be useful and/or inspirational for my own ornaments. Here are
some that I used...
There are so many ideas out there on Pinterest. See what inspires you!
By now my mind was reeling with all the possibilities. I could include these with my small gifts!
Include one with that bottle of wine brought as a hostess gift! I could make some fancy ones for my mom! I could make my newest niece some
animals! I think the best thing about these is that
they are quick and can be as simple or as difficult as you want to make them. They provide almost
instant gratification, and don’t require lugging out a lot of supplies. Here are some of my finished ornaments.

So, I have a tendancy to get a little obsessed with these
things. So, I thought, while I am
sitting at the table working on these, wouldn’t it be great if the kids could
get in on the fun?? So, while they are
too young to sew, I thought paper, glue and stickers would be great. I gathered some Christmas and winter themed scrapbook paper and stickers. So, using simple shapes inspired by the shapes of the ornaments I was making, the kids were able to create their own! These ornaments can go on your own Christmas
tree, or even gifts to teachers or grandmas and grandpas!
My Quest to Reclaim Christmas
I used to love Christmas.
As soon as the Thanksgiving plates were cleared, I was in full Christmas
mode. Queuing up the Christmas music, playing carols on the piano. The hustle and the bustle of the stores, the beautiful
lights. The cold, crisp air. Oh, the magic of it all!
Then I got married and had kids.
It seemed as every year went by, the stress of the holiday
season became greater and greater. It
started as soon as Ken and I got married.
Trying to juggle each other’s family traditions and finding time for
them all proved quite complicated. Every
year involved a huge discussion deciding just how our time would be split up
between our families. And it didn’t just
affect our own families—the domino effect of all the extended family involved
made scheduling the holidays a near impossibility. Tensions would rise on every side. I would inevitably end up having a huge
meltdown. Usually on the way over to
whoever won the coin toss that year.
Three years into our marriage Ken exclaimed, “It’s not Christmas unless
Jen is crying!” (Nice.) (But also true.)
When the kids came along, I was spending Christmas Eve
driving all over Northern Illinois, kids (and all their stuff) in tow. I spent all day (and night) making sure the
kids were not breaking anything, were behaving, not eating all the
cookies. At two a.m., when the last
present was opened (yes, one at a time!), I was a hot mess. My husband was a hot mess. The kids were a hot mess. This sucked.
Then when we arrived home, I would set out a mountain of
toys out from Santa, and Ken would spend an eternity putting together all the
last minute big-ticket items. (Think
play kitchens, tricycles, wagons, Scooby-Doo Mansions.) I would help (usually by falling asleep on
the couch). Finally off to bed by five,
the kids would awake two hours later, eager to see the fruits of Santa’s
visit. I loved to see them so excited,
don’t get me wrong. But ten minutes in,
even they didn’t want to open up any
more presents. And I would be looking at
the clock, rushing them along. After
all, whatever family lost the coin toss yesterday was coming over today. I would have a dinner to prepare, with all
the trimmings. All the gifts from
yesterday and from Santa needed to be put away.
(Because my house would NOT be a mess!!) A new set of holiday dresses,
and yes, more presents.
I began to loathe Christmas.
I would see the decorations in the store after Halloween (really, isn’t
that a little early?) and a feeling of dread would come over me. Immediately the lists would start forming in
my head—pictures need to be taken of the girls for Christmas cards, teachers’
gifts, family lists, what to get my mom, all the holiday parties, menus, cookies…
Everything that I had loved about Christmas was gone, and all that remained was
panic.
Last year, I had enough.
After a rough year of job changes and long hours, I was mentally
incapable of dealing with the holiday drama.
If it were not for my kids, I would not have even put up the tree. I told Ken, we will go to one house on
Christmas Eve. We will have the other
set of grandparents for an uncomplicated meal late on Christmas Day. No one else.
With no huge obligations to speak of on Christmas Day, we stayed in our
pajamas until noon. We hung out! We relaxed!
The kids actually played with the toys they received! I think I might be on to something here…
This year I am taking it further. I’m on a quest to reclaim Christmas! Those moments of magic were getting buried
under all the, well, crap. Too many
presents. Too much trying to jam it all
in and missing everything that’s important about Christmas. I know I can’t change all of it. But I can make it better. I can stop buying my kids piles of presents,
and just get a few, meaningful ones. I
can stop trying to do everything, and just do a few things….really well. I can pause and make sure we are spending
time together as a family, whether it’s enjoying a meal together or doing a
craft with the kids. I can take a deep
breath and look around and enjoy it all. I’m going to get that magic back!
So join me this holiday season as I explore simple ways to
put the meaning back into Christmas.
We’ll do some crafts, we’ll make some homemade gifts, we’ll save some
money, and we will certainly have some delicious food. Hopefully by the end, the merry will be back
in Christmas, and the bah humbug out!
Subscribe to:
Posts (Atom)